First steps
How to add frames, pick the keepers, build your own look and get a print. This is an introduction, not a manual: it says what lives where and in what order things happen. What each knob does is quicker to learn by hand — take one frame and turn things.
How the program is laid out
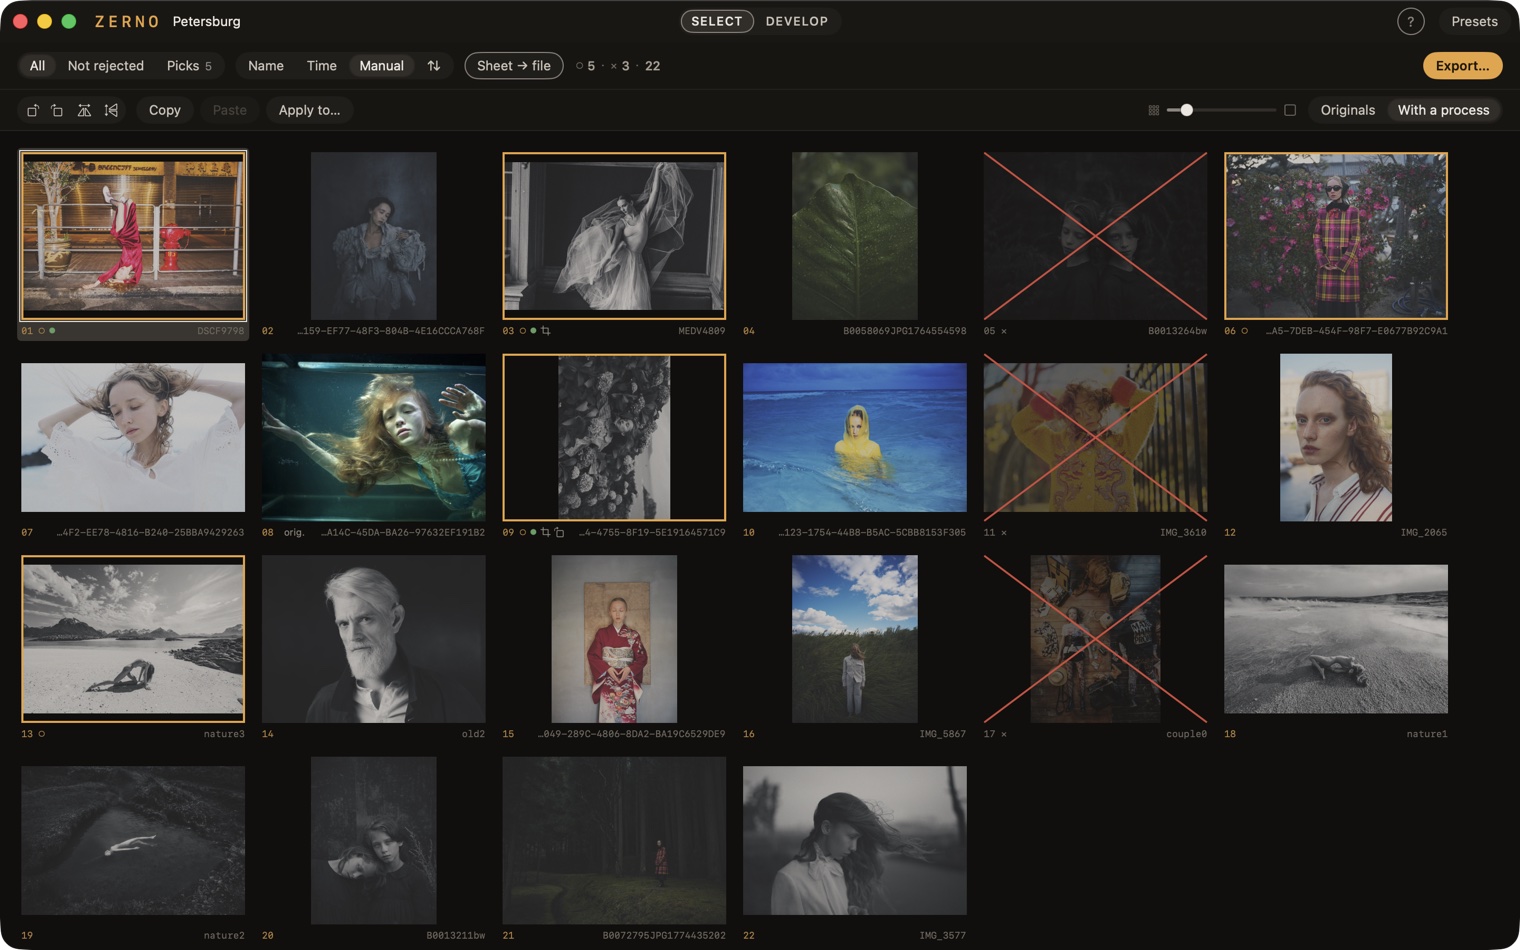
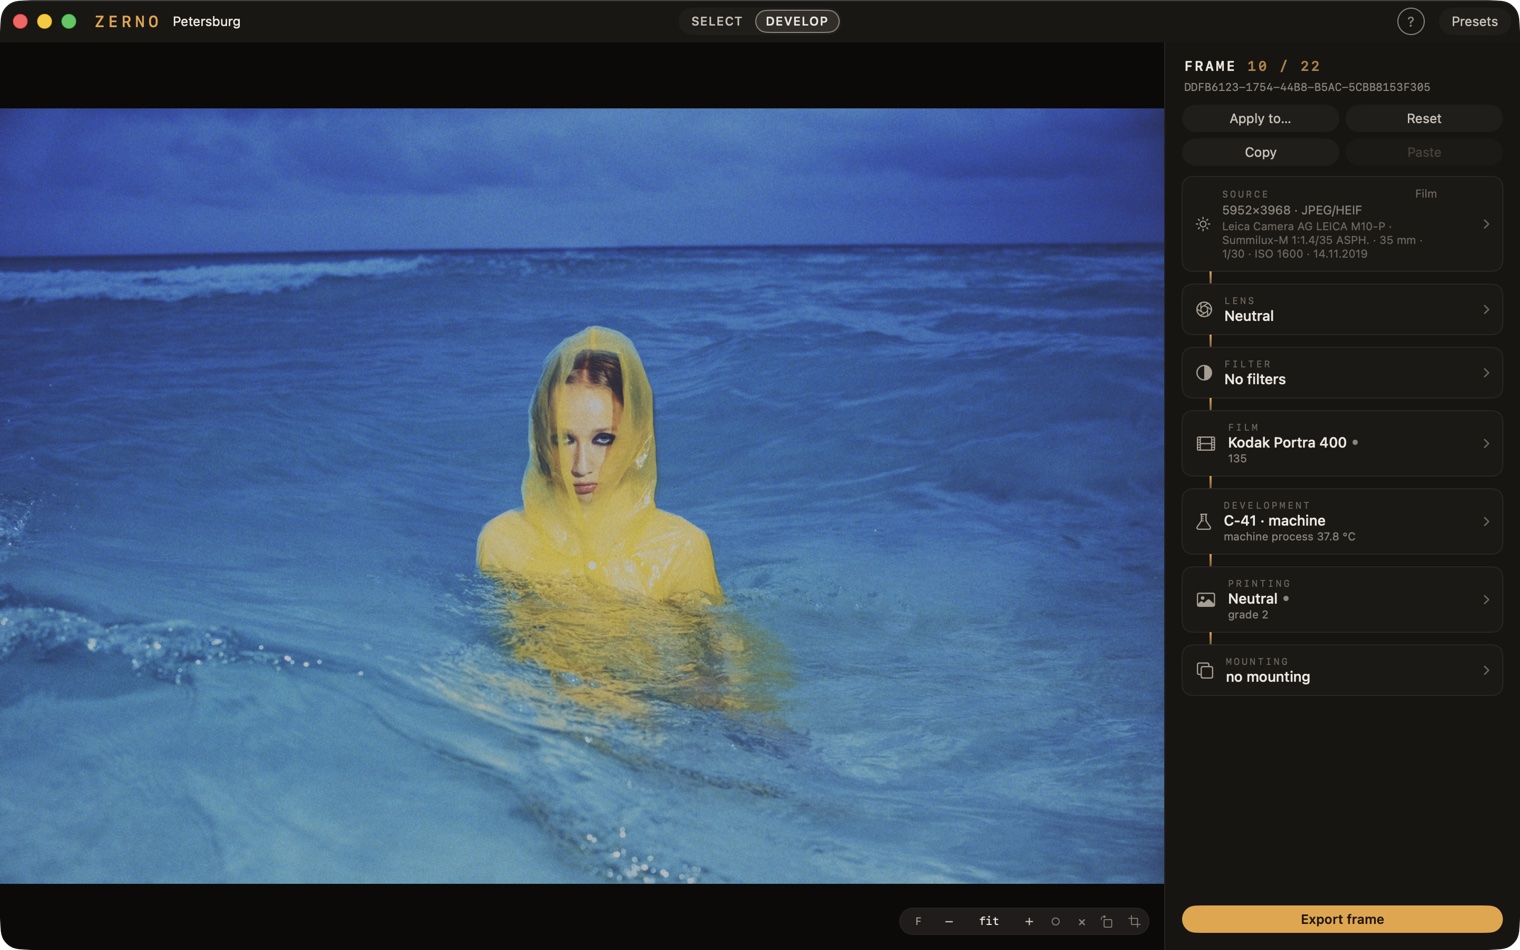
ZERNO has two screens and one rack. The SELECT screen is a contact sheet: every frame of the project in a grid, this is where you pick. The DEVELOP screen is one frame filling the window, this is where you finish it. The switch sits in the middle of the window's title bar, the keys are ⌘1 and ⌘2, and Space goes there and back.
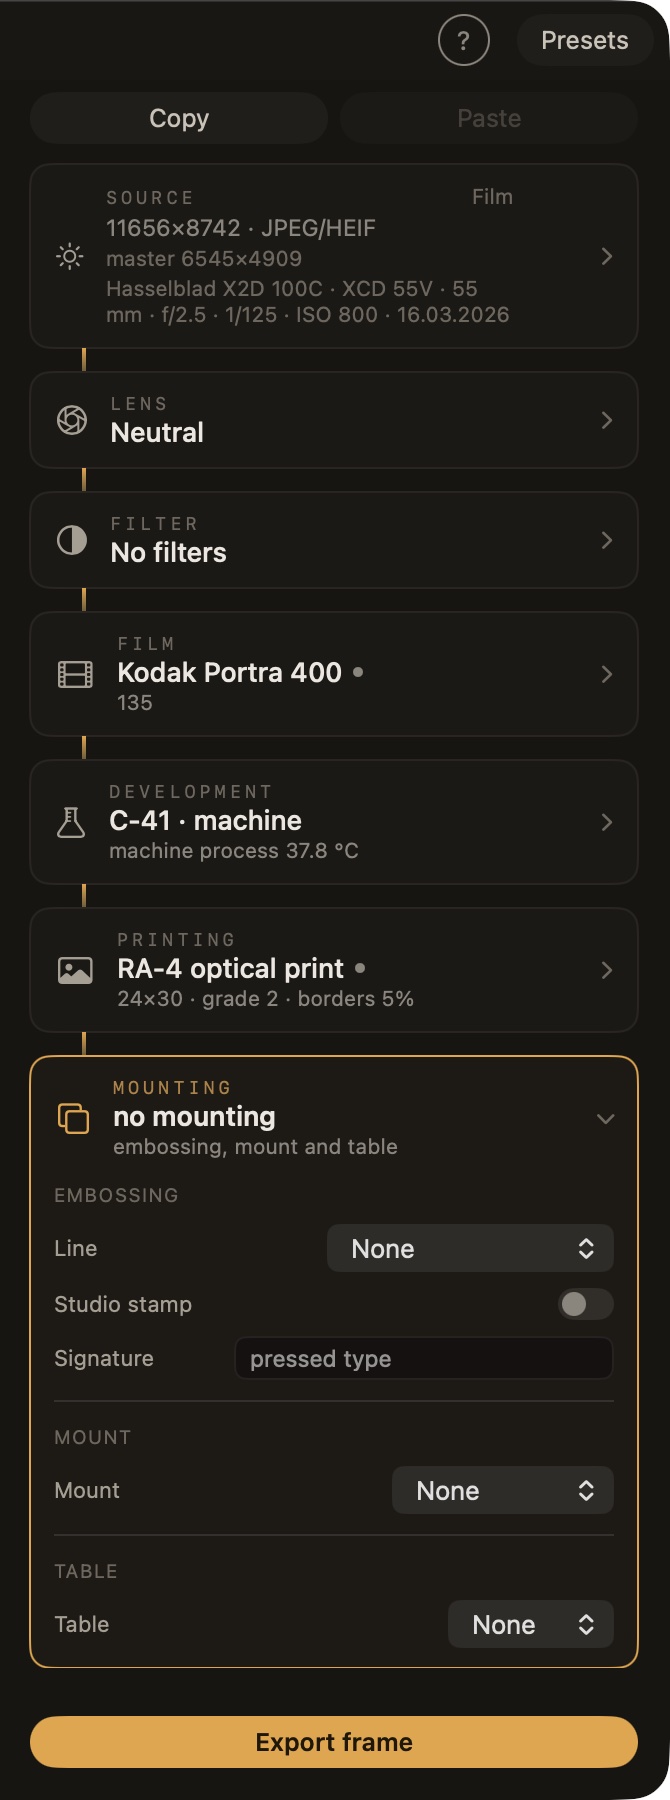
On the right of DEVELOP is the process rack. It reads from top to bottom, the way light travels in an enlarger: LIGHT · LENS · FILTER · FILM · DEVELOPMENT · PRINTING · MOUNTING. Whatever you change, you change a link in that chain, not "the picture". SELECT has no rack: you pick on one screen and print on the other.
Forgot where something is? The [?] button in the title bar (or the ? key) shows the shortcuts for the current screen. Panels get out of the way: Tab hides the rack and the bar over the frame, ⇧Tab also hides the title bar, F goes full screen. The accent colour of the interface is chosen in Settings (⌘,) — down to a neutral one, if you want nothing coloured next to the photograph.
A project stores parameters, not pixels: ZERNO never touches the source files, and a print only appears when you export.
First launch and the licence
Zerno is signed with its own key rather than an Apple developer certificate, and macOS will stop it on the first launch. This is neither an error nor a virus — the system simply does not know the developer. Three steps, once per version.
- Move Zerno to the Applications folder and open it. In the window that says "Apple could not verify Zerno is free of malware", press Done — not "Move to Bin".
- Open System Settings → Privacy & Security, scroll down to the Security section: there is a line about Zerno and an Open Anyway button.
- Open Zerno again and press Open. From then on it opens like any other program.
The short route for macOS 14 and a command for those at home in Terminal are on the Download page.
Then the licence window opens, and it has two doors. Try it for 5 days — no code needed: for five days the whole program works with nothing held back, you only need the internet at launch. I have a code — paste the code that looks like ZRN-XXXX-XXXX-XXXX from the email. Everything about the licence is on the Get a licence page.
Adding frames
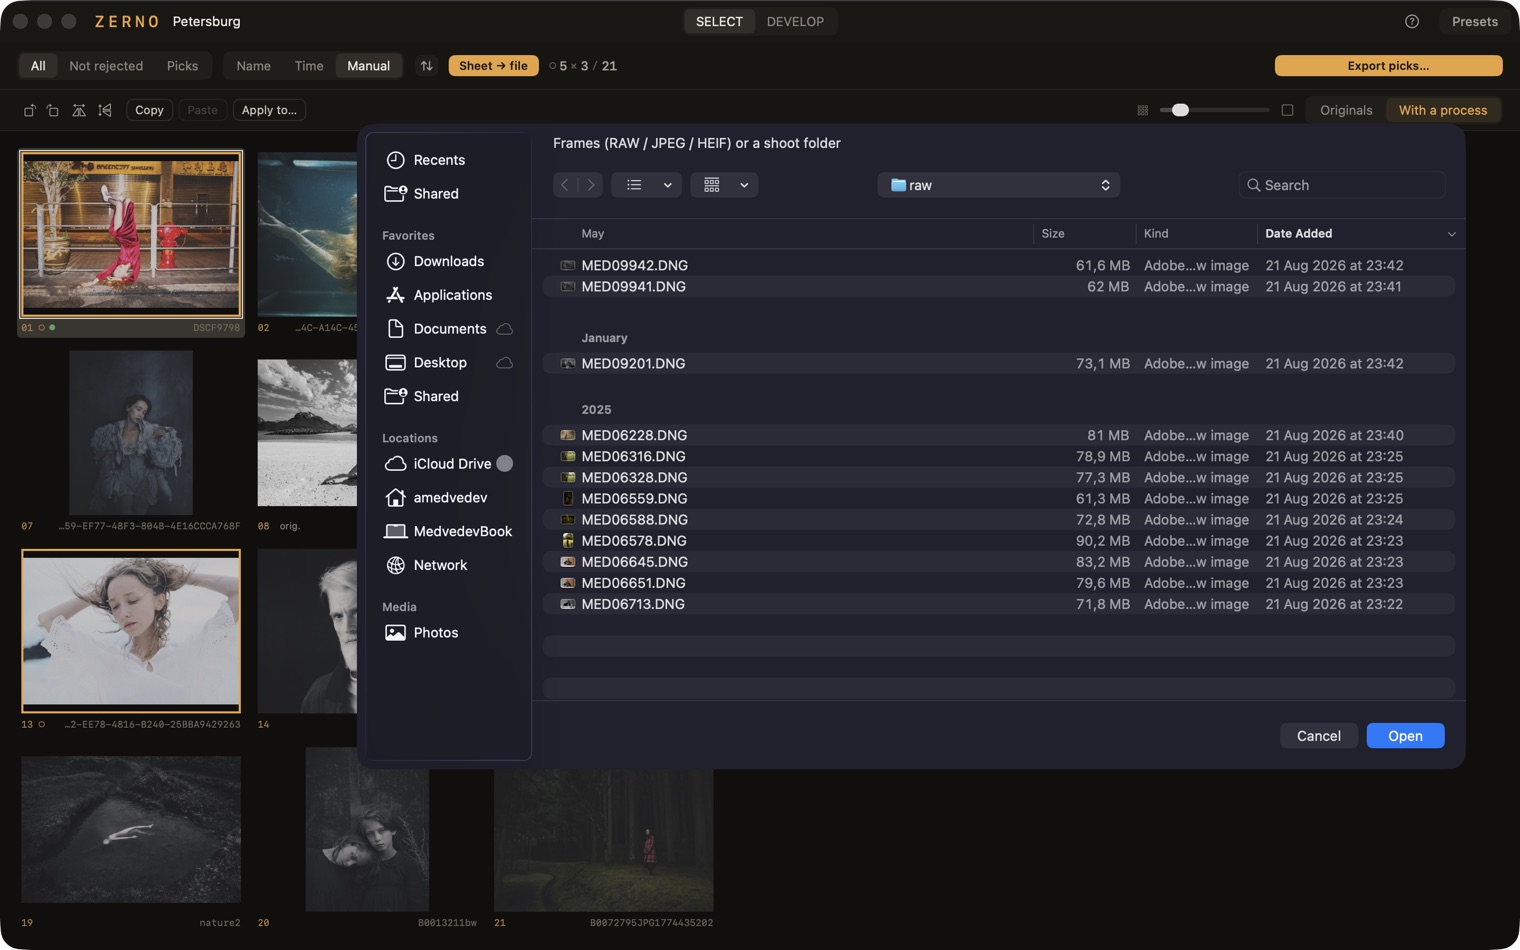
Three ways, all equal: ⌘O, dragging files or a folder from Finder straight onto the grid, or File → Add Frames…. RAW from most cameras, JPEG and HEIF are accepted. Frames line up by name; the order can be switched to shooting time or rearranged by hand.
Save the project — ⌘S, a .zerno file. It holds the marks, the order and the process of every frame; the photographs themselves stay where they were, and at the next launch ZERNO reopens the last project by itself. After that it saves without reminders — once a minute, on export and on quit — and keeps earlier states as backups: File → Restore from Backup….
If the files have moved, the project does not break: a bar appears above the grid, the cell gets a yellow ⚠︎, and the Locate… button asks for the new folder and reconnects the whole set at once. Marks, crop and settings live in the project, not in the file.
SELECT: picking
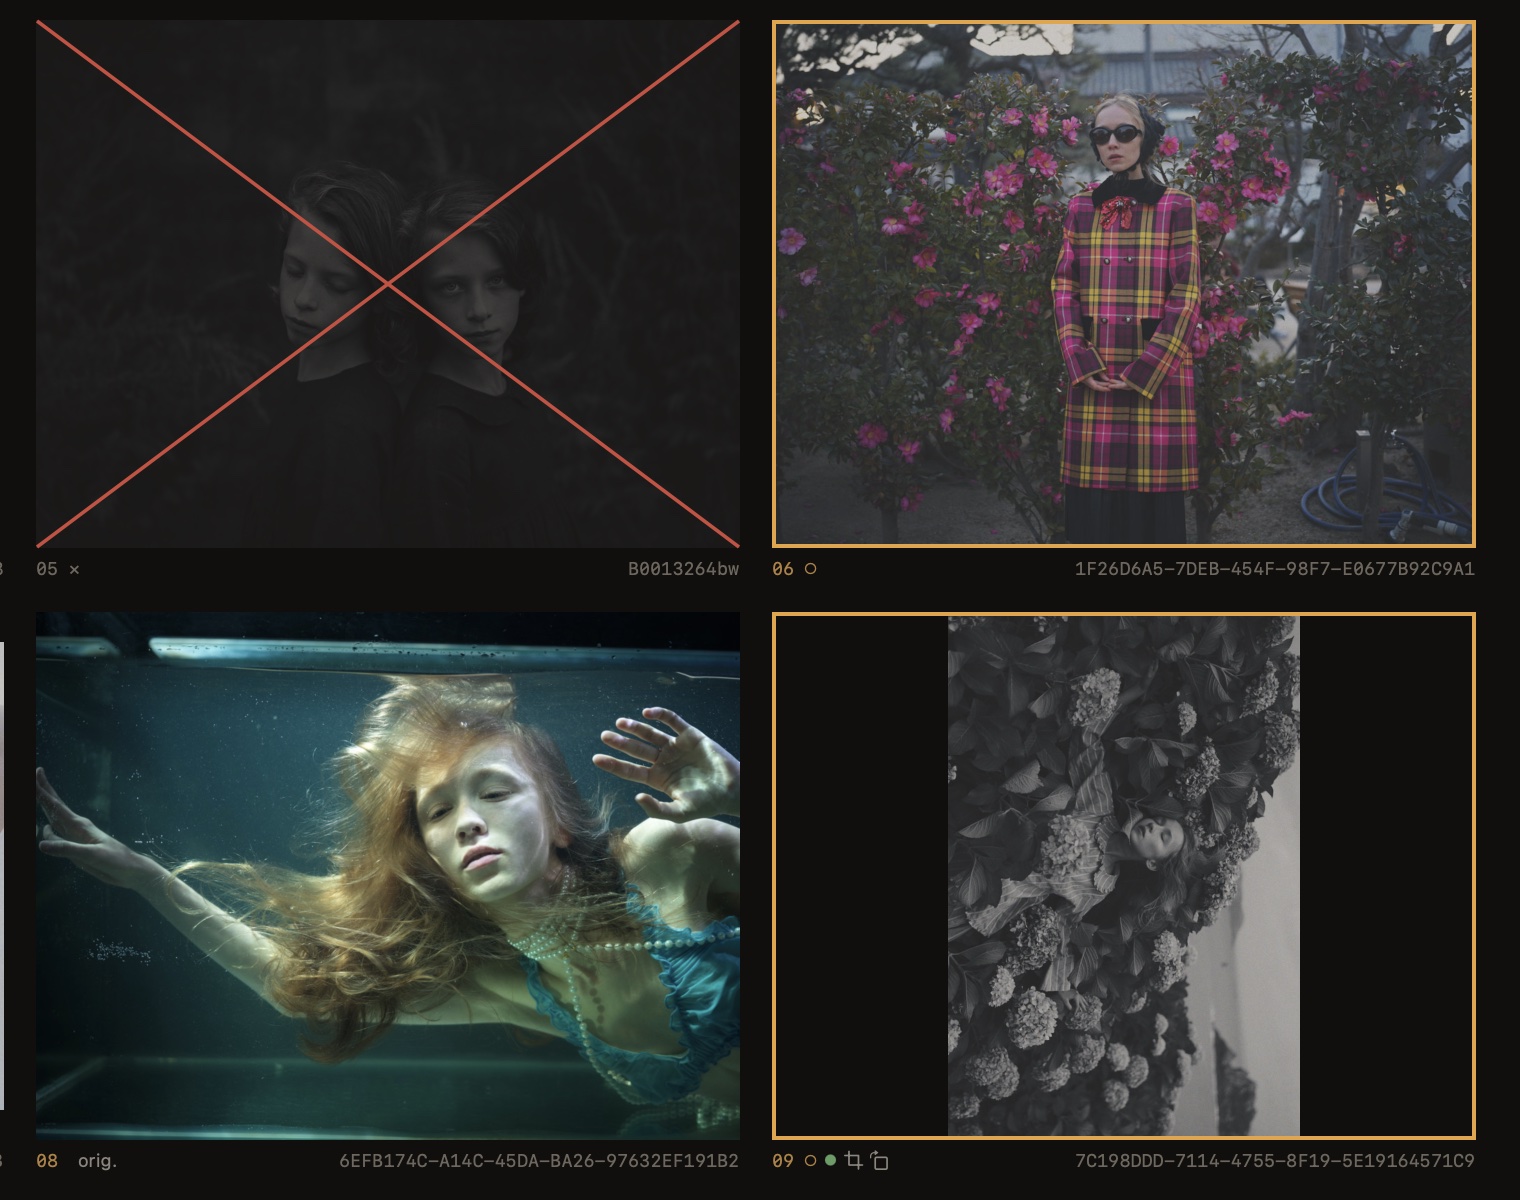
The grid shows previews. The size control in the panel above it changes their size, and the switch on the right — Originals | Processed — shows the frames as shot or through their own process.
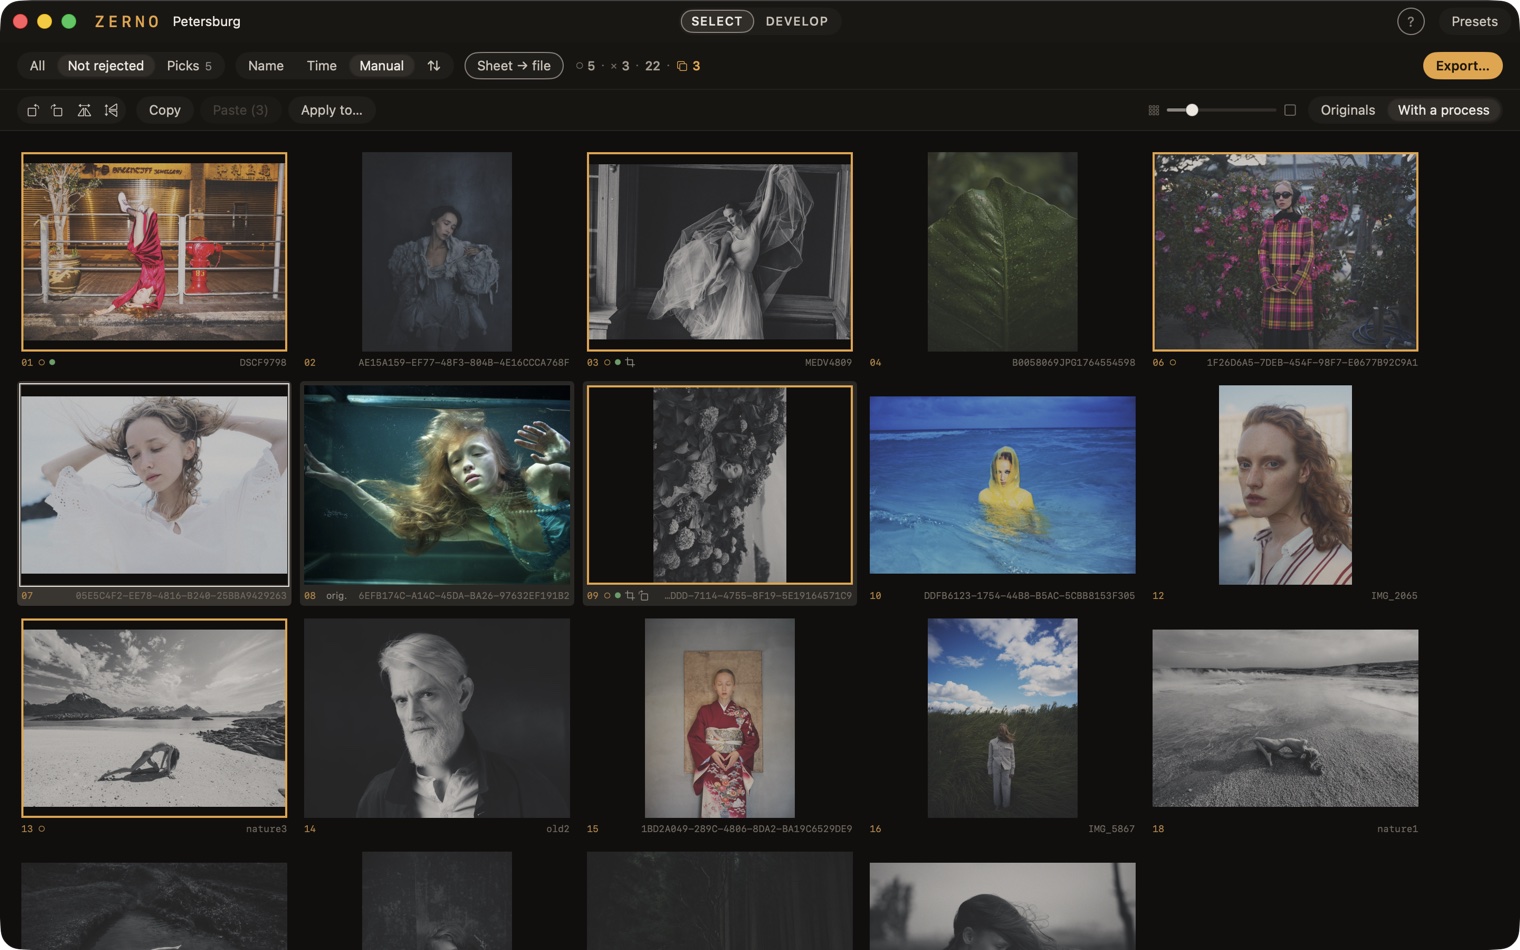
Two marks, two keys. O — a pick, the frame gets a golden border. X — a reject, the frame dims and is crossed out. Pressing again clears the mark. On the left of the panel is the show filter — All · Not rejected · Picks: it hides the rest not only in the grid but also when stepping through frames in DEVELOP, and in the contact sheet.
You can work on several frames at once: ⇧-click and ⇧-arrows extend a range, ⌘-click adds and removes one at a time, ⌘A takes everything visible, a rubber band over the background takes everything it touches. From then on everything applies to the whole selection — marks, rotations, pasted settings, Delete — the number sits right in the menu item ("Reject (5)"), and one ⌘Z undoes the whole batch.
To hand settings from frame to frame, there are three buttons in the second row of the panel: Copy and Paste (⌥⌘C and ⌥⌘V) move the current frame's settings onto the selected ones, To all… gives them to every frame in the project.
A frame you have not touched is shown as the original everywhere — in the grid, in DEVELOP and in the export; under its preview is a dim "orig.". The other state badges live there too: a green dot — the frame has been developed to a file, ⌗ — it is cropped, ↻ — it is rotated.
DEVELOP: finishing a frame
Space, Enter or a double click — the frame opens full size. The ← → arrows step through the neighbours (following the filter), Esc or Space go back to the grid.
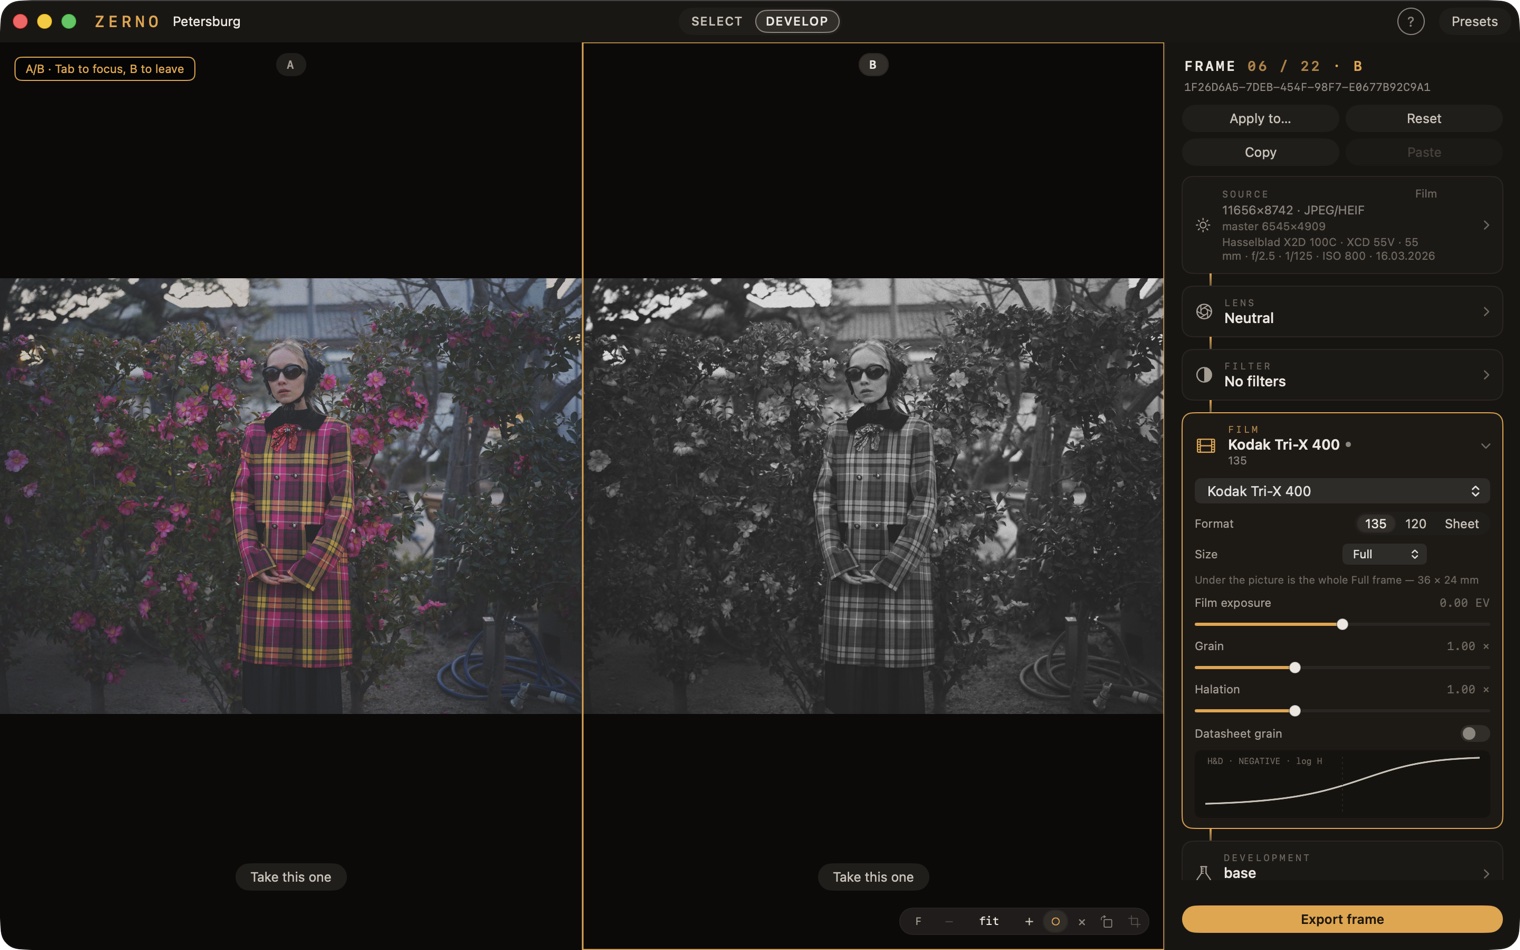
This is where zooming lives: a click on the photograph switches between fit and 100 %, a pinch on the trackpad zooms smoothly. At the bottom, over the frame, is a bar: the stage badge (the letter P, S or F — what is on screen now; while the frame is still printing, an arc grows around it), zoom, the ○ and ✕ marks, rotation and crop. It sits on the right or in the centre — View → Canvas Bar. The file name and the frame badges are in the rack, on the line under “FRAME”. Hold ⌥ to see the original before developing. The B key puts two versions of the frame side by side: handy for comparing two films or two papers on one shot.
The rack applies to this frame. A fresh frame is shown as it is — the rack stands at "Neutral", dimmed, and says so outright: touch any knob and we start printing from there. Four buttons at the top of the rack: Apply to… hands this process to other frames, Reset removes the settings and returns the frame to the original, Copy and Paste carry the settings from frame to frame.
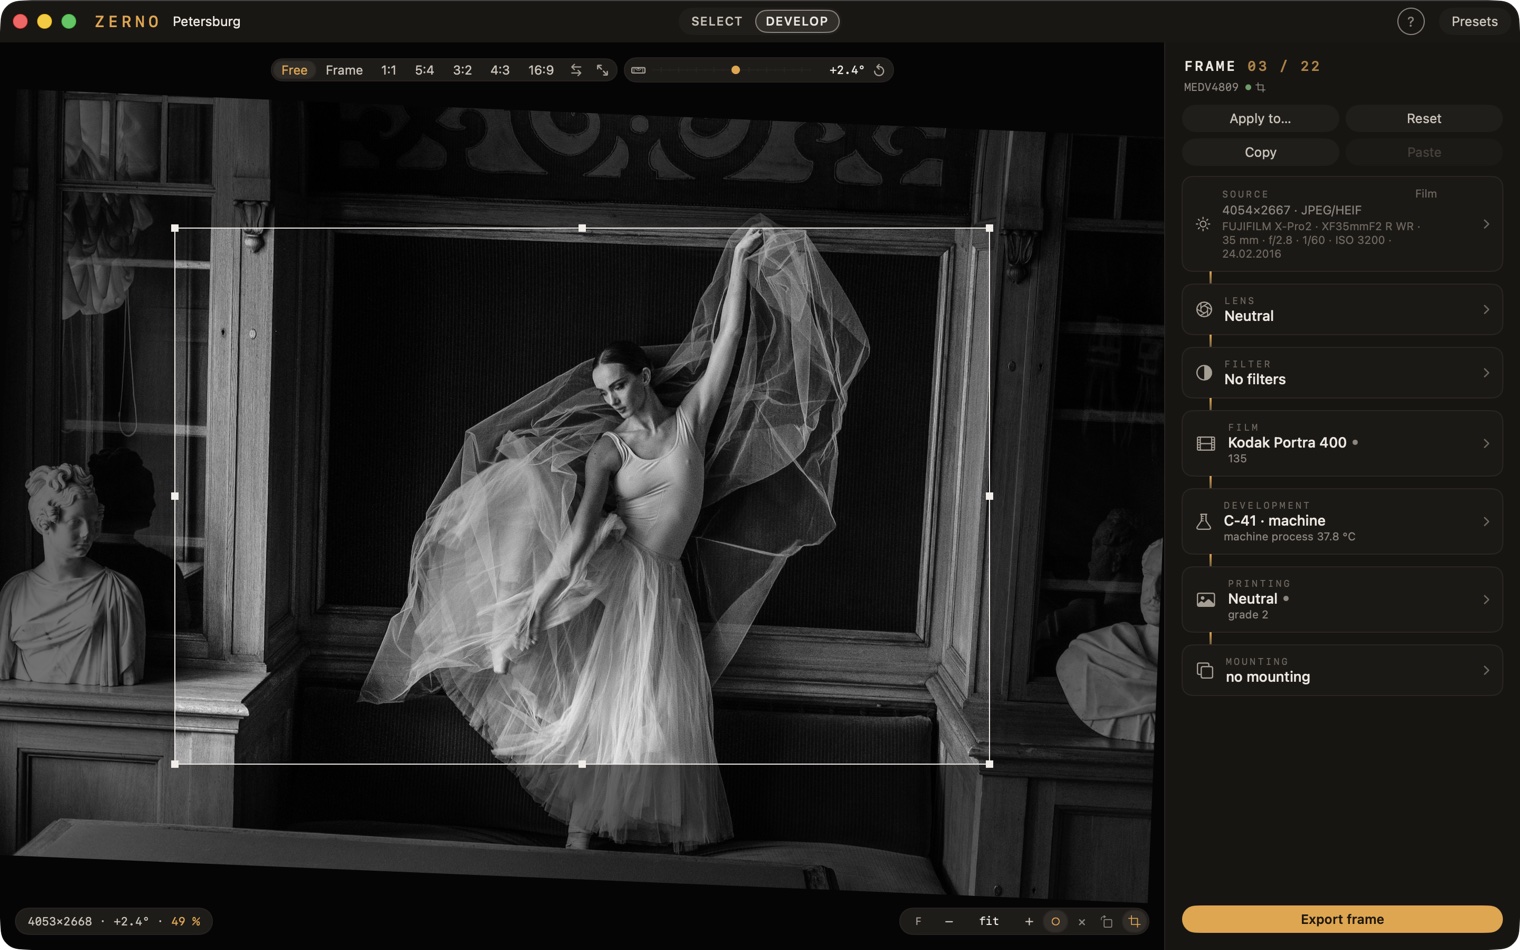
Crop — the C key or the ⌗ button next to rotation. The shot is shown whole and unprocessed, with a frame on top: drag the corners and the sides, drag inside to move. Above are the ratios (among them Frame — the whole frame of the chosen film size) and the ⇄ button; below is the tilt ruler, which levels the horizon. Easier still — the level button, or ⌘-drag along the horizon itself: the program works out the angle. Return applies, Esc cancels, ⇧C clears the crop entirely — the frame, the ratio and the tilt. The frame size and the share of the area are on a small plate at the bottom left. While the frame is cropped, the ⌗ sign on the bar lights up in the accent colour.
From then on the frame is cropped everywhere — previews, contact sheet, export. The crop is taken from the input, before everything else: no resolution is lost, the master is simply computed from a smaller area.
The rack: where to start
Don't touch everything at once. An order worth starting with:
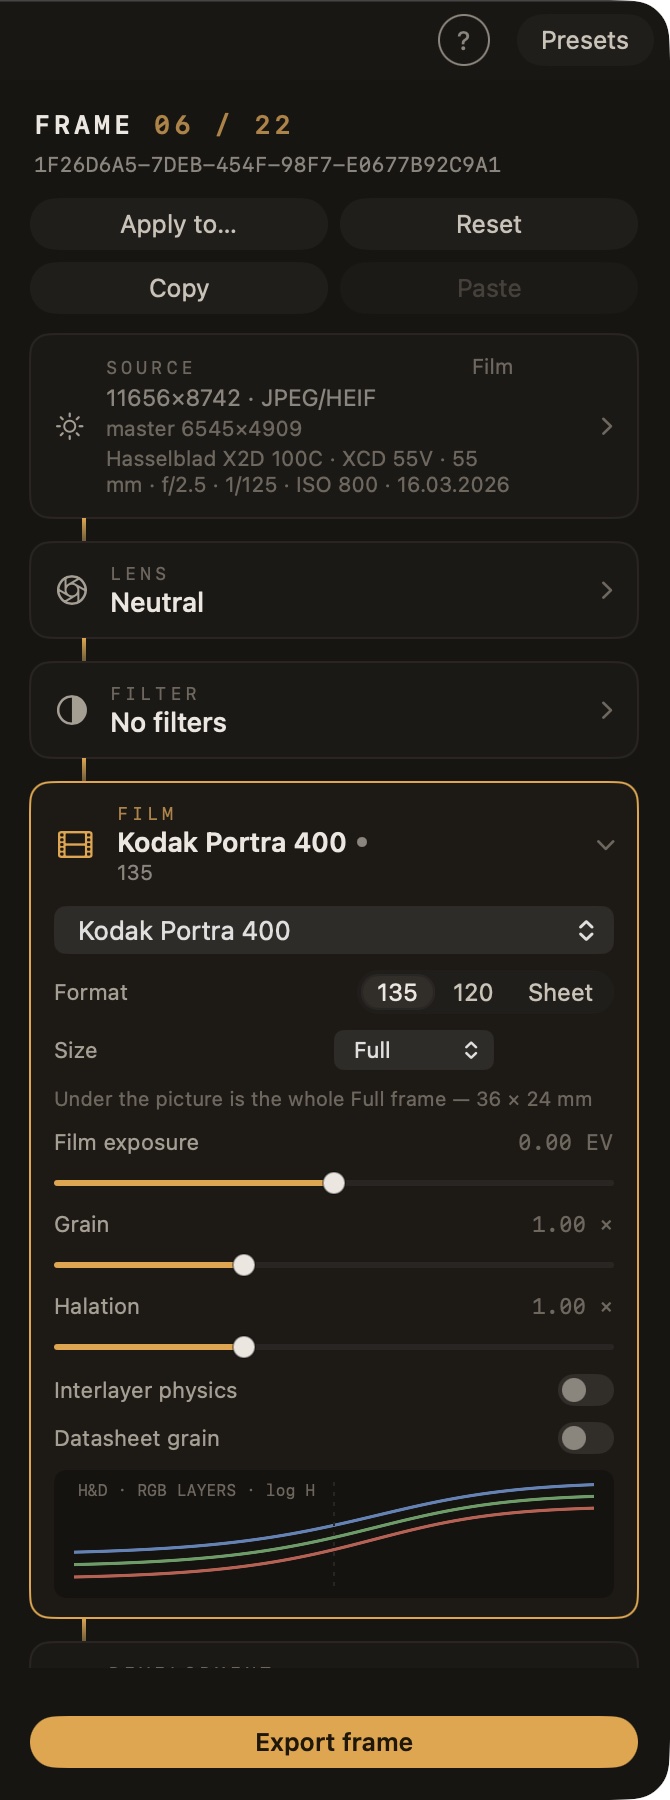
- FILM — choose the emulsion. This is the main decision: each has its own curves, colour and grain. For a colour frame, start with Portra 400; for black and white, Tri-X 400.
- LIGHT → Exposure — if the frame is dark or light, move it by a stop. Film forgives overexposure more readily than underexposure.
- PRINTING — what we look at it on: a scan (the way film is most often seen), paper — B&W or colour — one of the old processes, or reproduction. Paper has knobs of its own — contrast and print brightness (to the right is lighter); borders and the film rebate live here too.
- LENS — the lens and the aperture. Wide open gives character: glow, vignetting, swirl; stopped down gives a clean drawing.
- FILTER, DEVELOPMENT, MOUNTING — once the base already looks right.
After that, turn whatever you like: there is nothing to break. The ▸ next to a block's name opens it, ⌘Z undoes step by step, a double click on a knob returns it to its default, and ↺ in the block header resets the whole block at once. What an unfamiliar knob does is usually in its tooltip — hold the cursor on it.
The full list of what is inside — by name and with numbers — is on the What's inside page.
Presets
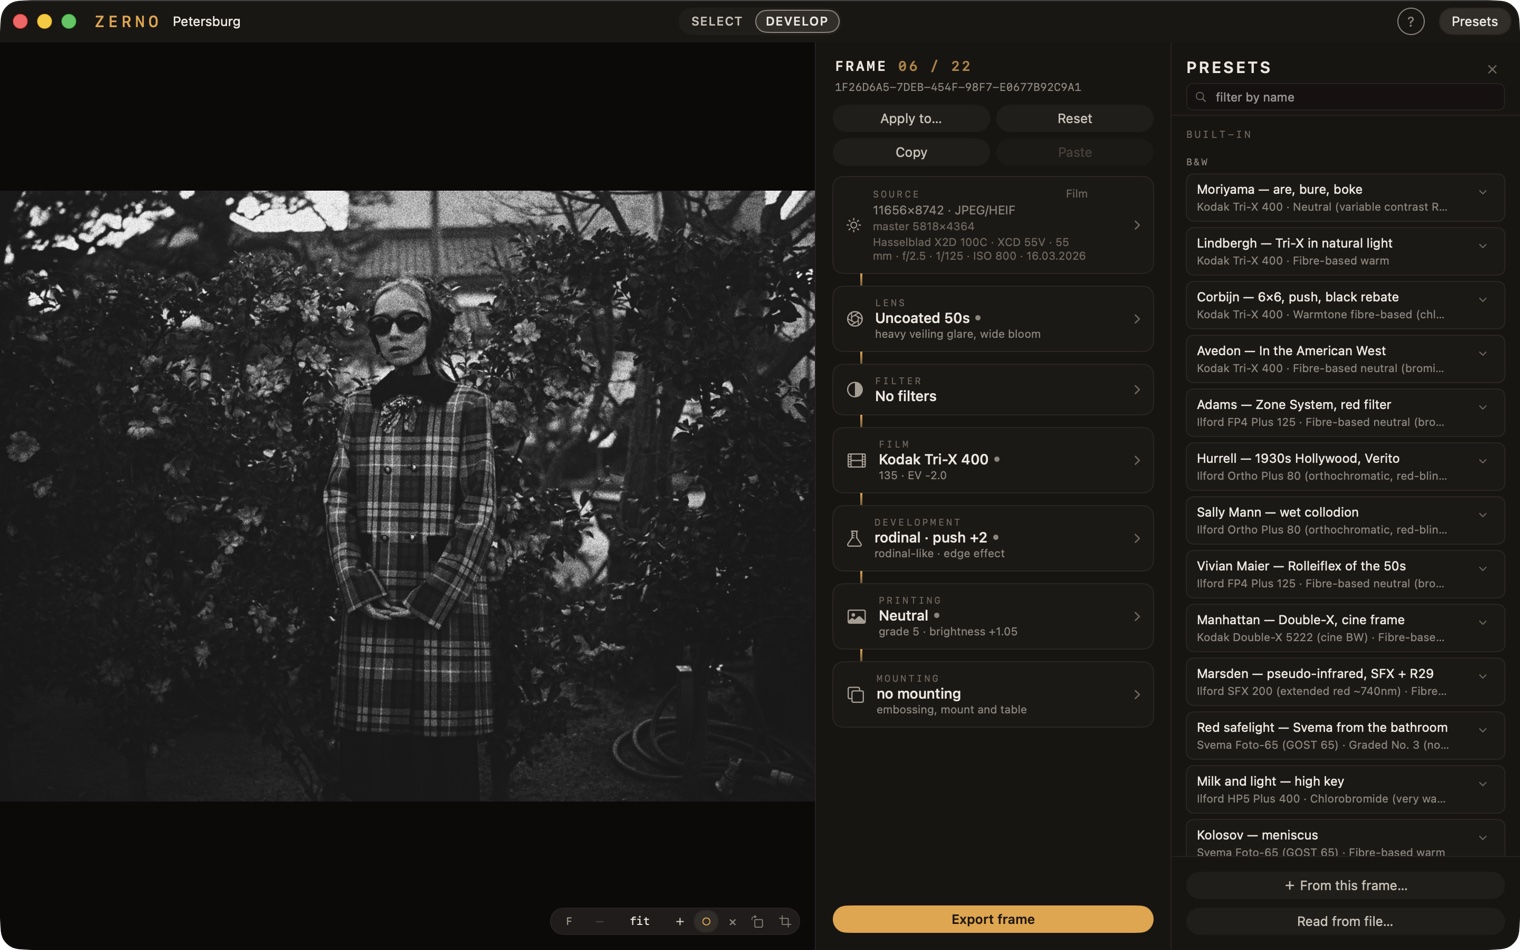
The Presets button on the right of the title bar opens a second panel. The built-in ones are grouped — black and white, colour, slide, old processes, instant; a click on a row applies the preset to the current frame, a right click — "Apply only…" — a single block of the rack.
A preset is a stamp, not a link: it overwrites the knobs, and from then on you turn them as you like. Open the rack after "Moriyama" and you will see what it is made of: Tri-X, a push, Rodinal development, uncoated glass — any of them can be taken apart and remade to taste. Your own set is saved with "+ From the current frame…"; the .zpreset file can be sent to another ZERNO user — it will open for them.
Export: what is where
Three actions, three places.
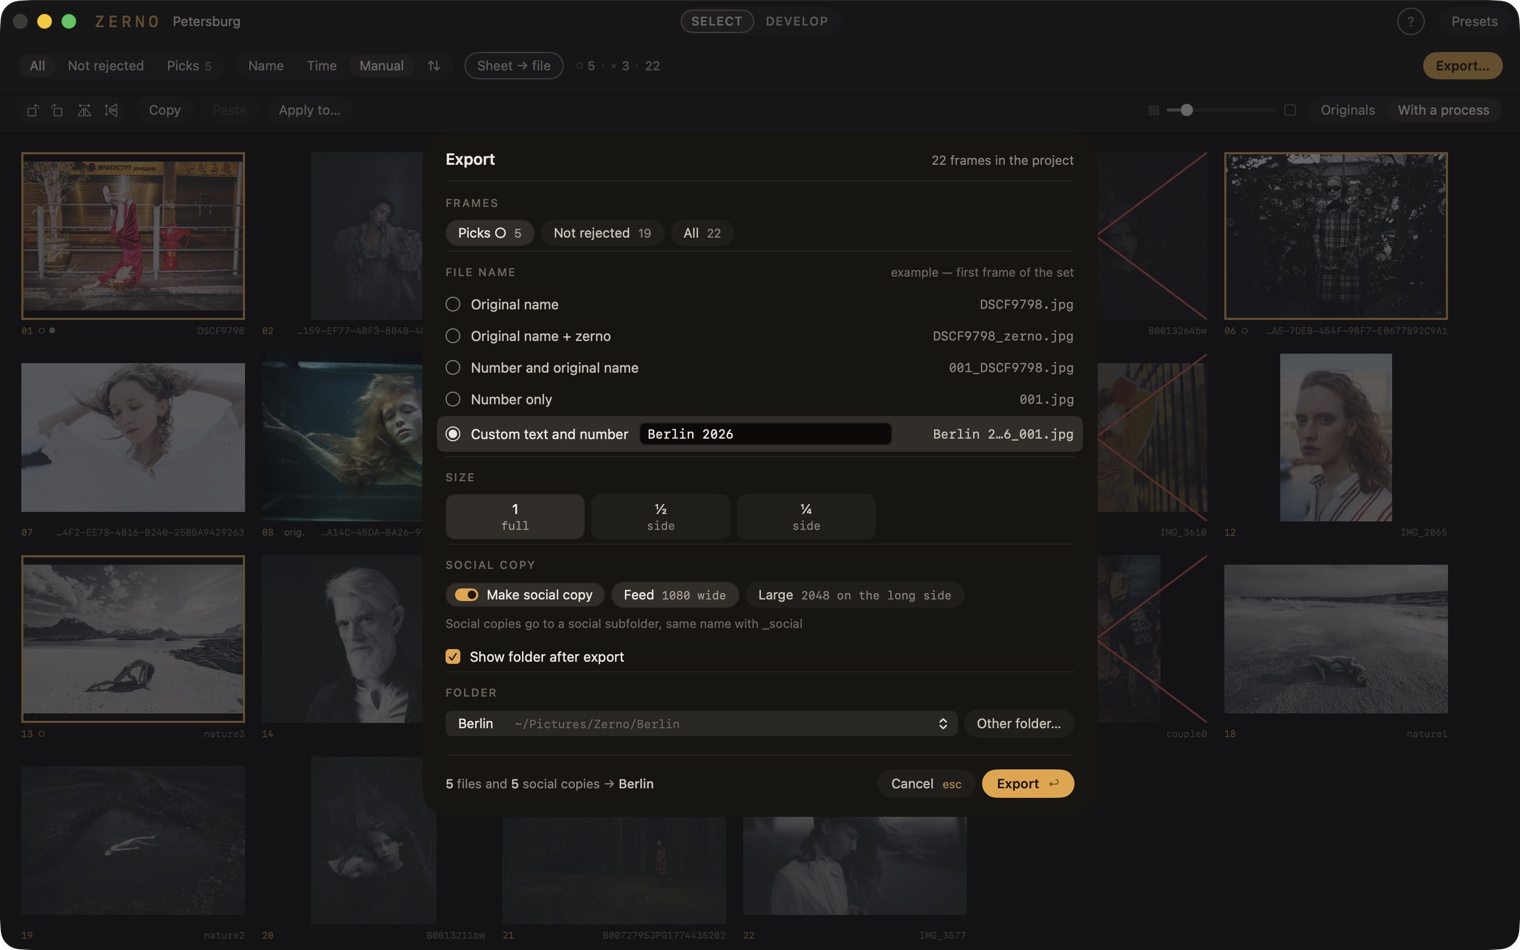
Export… — the button in the panel above the grid, ⌘E. Batch export is one window: the set (Picks ○ · Not rejected · All), the file name, the size, the social copy and the folder; Export starts it right away. The folder is chosen in the window itself — the last seven in the pop-up menu, any other with “Other folder…”. If several frames are selected, the first set in the window is about them.
Export frame — the button at the bottom of the rack on the DEVELOP screen, ⌥⌘E: the same window, without the set, with the file's dimensions and a sixth naming rule — Custom name: type the whole name, Berlin, sunset.jpg, with no number.
File name for a set — one of five: the original name (MED06316.jpg), original + zerno (MED06316_zerno.jpg, the default — the original next to it is never overwritten), number and original name (007_MED06316.jpg), the number only (007.jpg) or custom text and number — type “Berlin 2026” right in the window and get Berlin 2026_007.jpg. Next to each rule is an example on the first frame of the set. The number is the frame's place in the set, with leading zeros, so the files sort in order. If the folder already has such a file, ZERNO asks: replace it or keep both — then the new one gets “ 2” at the end of its name.
Sheet → file — the button in the same place as the batch export, ⇧⌘E. A contact sheet as PDF: exactly the set, and in the order, that is shown right now.
The window has a size — 1, ½ or ¼ of the side — and a Make social copy switch on the “Social copy” line: next to the master, in a social subfolder, goes a reduced copy of it (the same print taken smaller, not a second render) for a feed or a messenger. Everything around the frame — rebate, borders, mount — grows the canvas; the frame itself stays pixel for pixel.
While an export is running, the button becomes a progress bar — “3 of 12 · ~1:20” — and can be stopped: the files already written stay. Developed frames light up a green dot in the grid.
Keys that will do
What next
To see how one and the same scene looks on different films and papers — Gallery. The full list of what is inside, by name — What's inside. Answers to frequent questions and what to do when something goes wrong — Support. Not found — write to us: ask@zerno.photo.